Skip to main contentStep 1: Import your Assets
Once you’ve created a new project, you will need import any new project assets to the asset library. You can navigate to the asset library by
clicking on the “Folder” icon in the navigation bar.
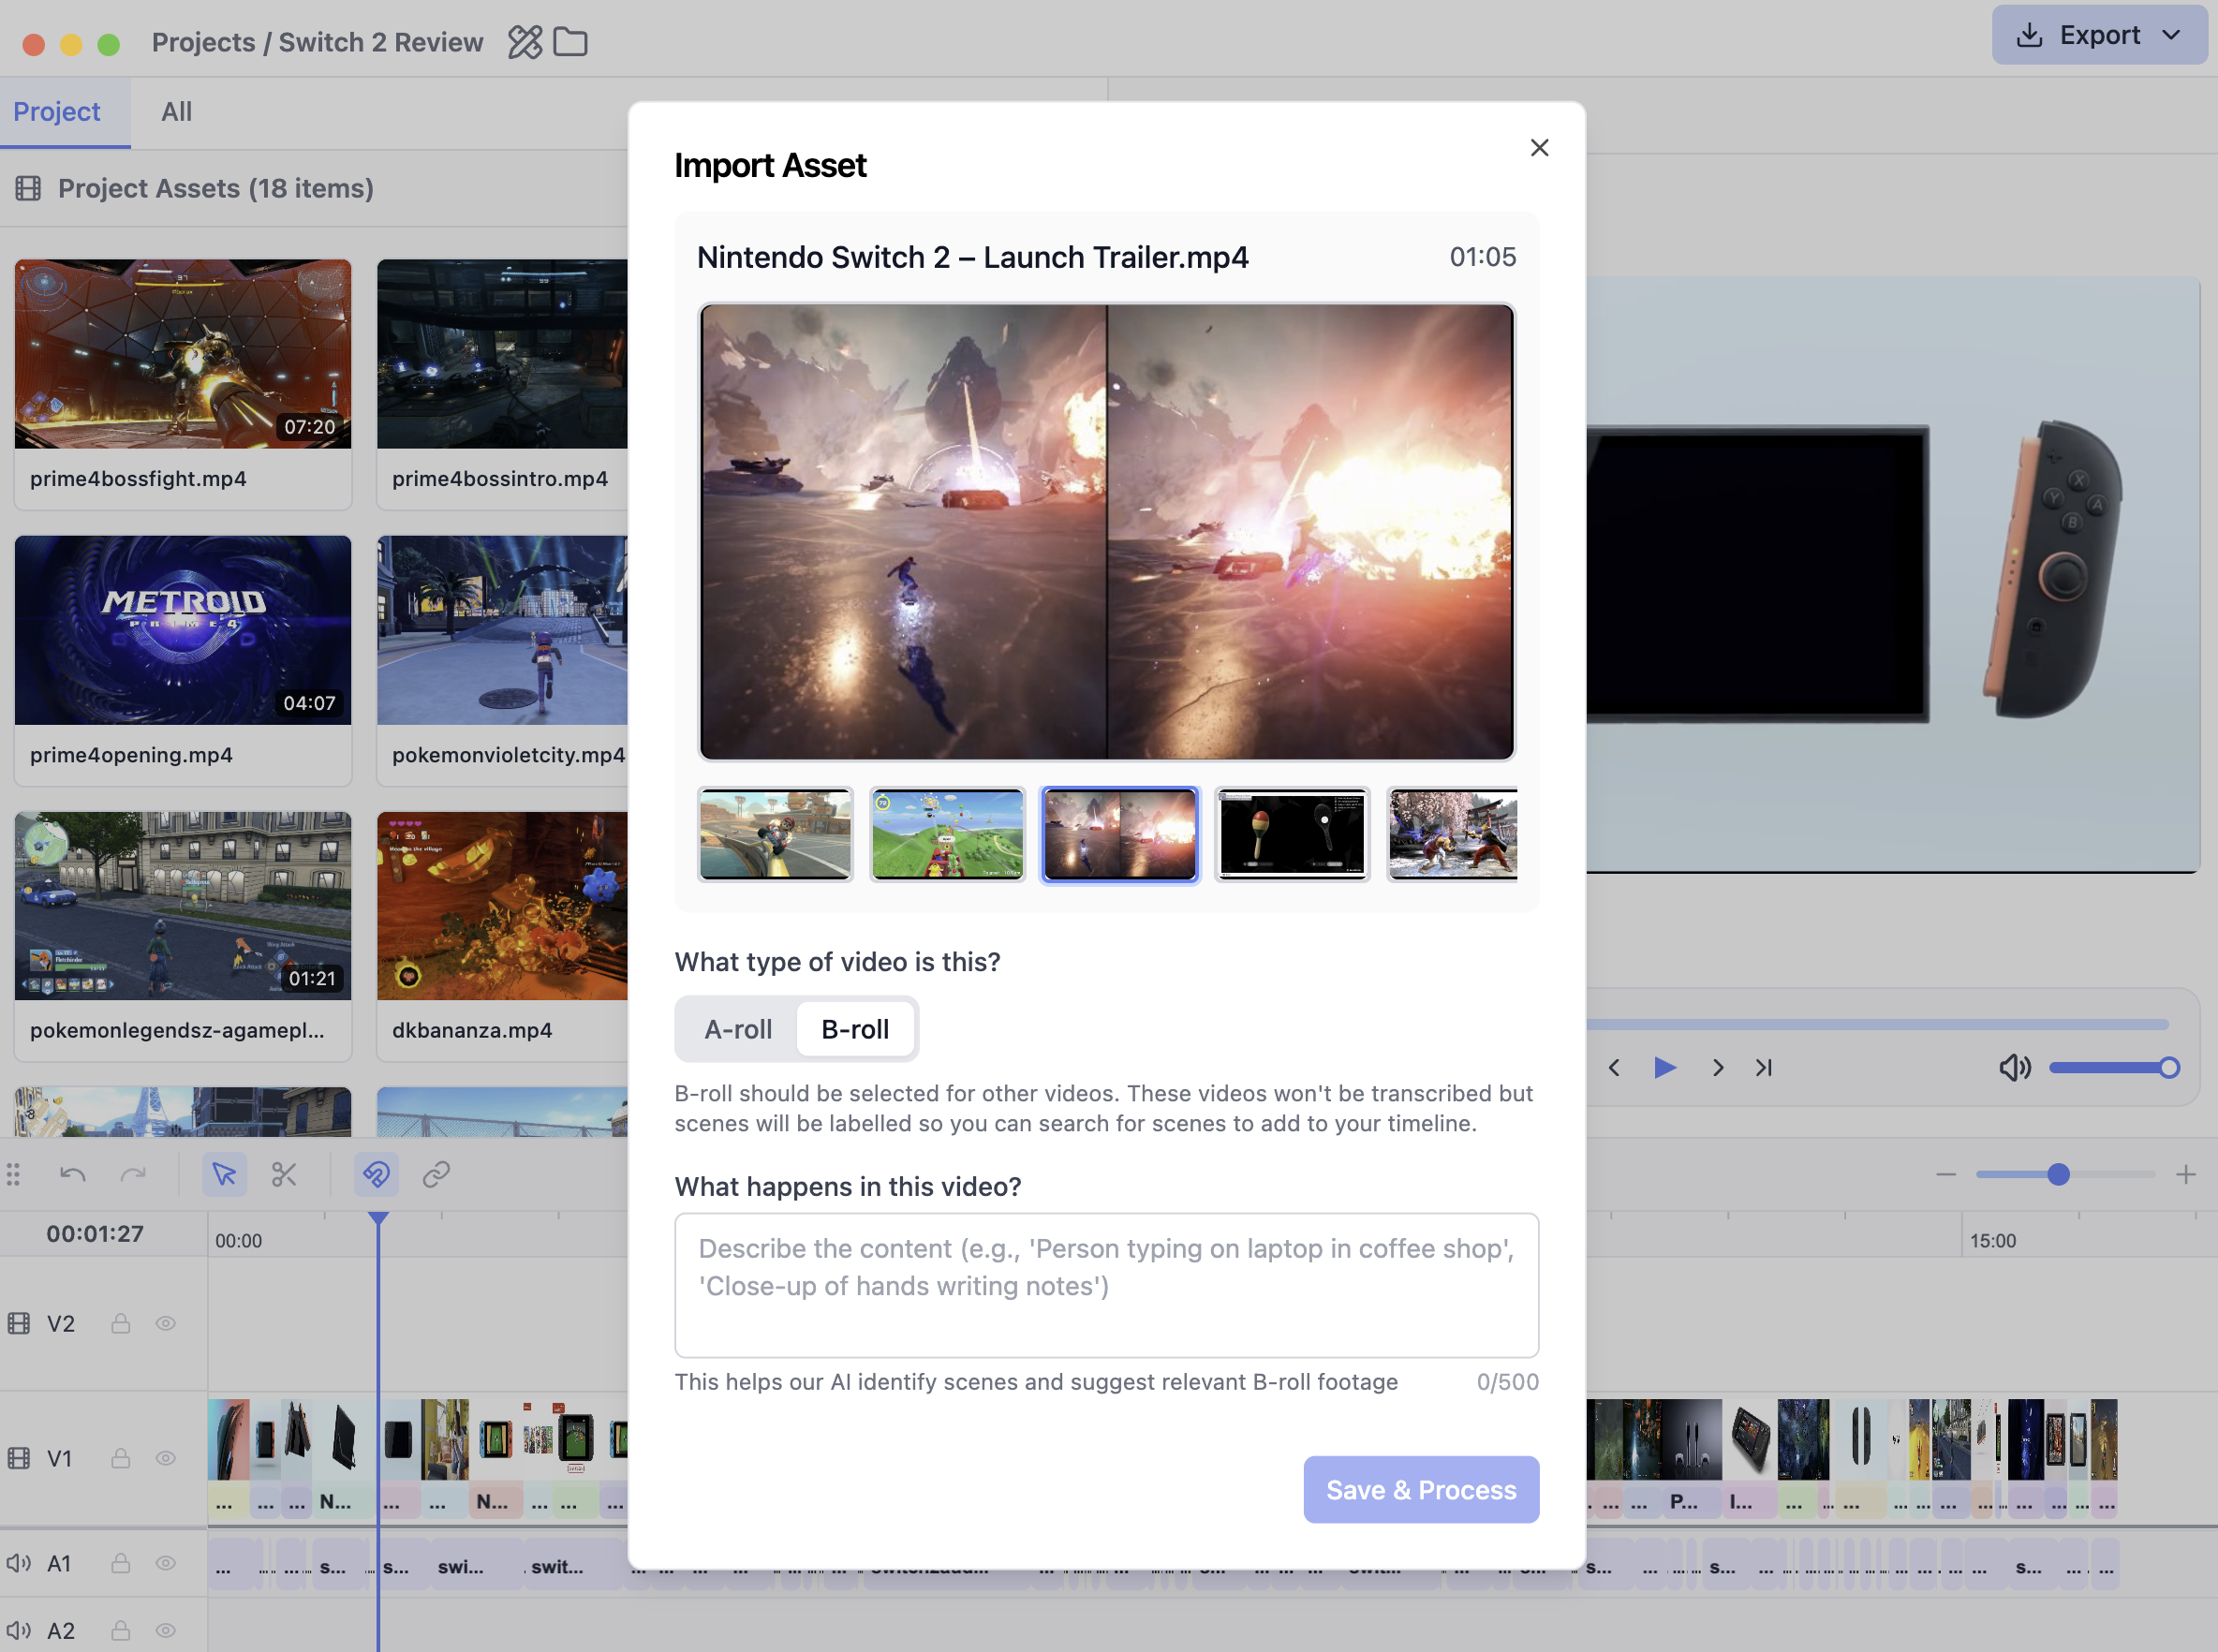
In the asset library view, click on “Import” and select any video or audio files to be added to the project.
For all of the imported video files, you will need to specify whether the video is A-roll or B-roll.
-
A-roll: Videos that contain the primary voiceove (i.e. talking head). These videos will be transcribed when added to the text editor but will not be processed for search.
-
B-roll: Videos that contain footage that will be added on top of the primary voiceover. These videos will be processed for clip search, allowing you to quickly search
for specific scenes from your raw footage. To improve the quality of clip search, you are encouraged to provide descriptive context that will be used by our AI to analyze the footage.
Step 2: Edit your voiceover
After importing your assets, you can now navigate back to the editor view and add either the audio or video voiceover(s) for your video. Click the “Add Voiceover” button in the text editor video
to select your voiceover content. The audio will then be transcribed into the text editor.
You can now select and delete text in the text editor to make cuts to your timeline!
Once your voiceover has been edited, you can now add any b-roll footage to your voiceover.
You can add b-roll footage by selecting the text in the text editor and adding b-roll to selected section
Or, you can right-click and drag in the timeline to add b-roll for the selected duration
Step 4: Export your video
Once your edit is complete you can either
- Export to video as an MP4 video file
- Export as XML file to be used in Adobe Premiere Pro, DaVinci Resolve, or Final Cut Pro (Note: In DaVinci Resolve, you will have to import the XML file as a timeline via
File > Import > Timeline)
Congrats on editing your first video using Luminary!